

Table of Contents
- Introduction
- Step 1 - House Construction Process
- Planning and Design
- Selecting the Plot
- Location
- Size and Shape
- Legal Clearances
- Topography and Climate
- Importance of Soil Testing
- Understanding Soil Type
- Assessing Soil Strength
- Identifying Potential Issues
- Compliance with Regulations
- Collaborating with Architects and Structural Engineers
- Role of the Architect
- Role of the Structural Engineer
- Coordination Between Professionals
- Budget Considerations
- Finalising the House Plan and Design
- Detailed Planning
- Compliance and Approvals
- Selection of Materials
- Preparing for Construction
- Step 2 - House Construction Process
- Approvals and Legalities
- Acquiring Necessary Permits and Approvals
- Building Plan Approval
- Land Title Clearance
- Environmental Clearance
- Soil Test Report
- Height Clearance
- Utility Approvals
- Importance of Checking Local Building Regulations
- Safety Compliance
- Avoiding Legal Penalties
- Zoning Laws
- Adapting to Local Conditions
- Resale Value
- Utility Approval
- Ensuring Compliance with Environmental and Safety Norms
- Environmental Impact Assessment (EIA)
- Waste Management
- Water Conservation
- Energy Efficiency
- Safety Standards
- Noise and Air Pollution Control
- Step 3 - Site Preparation
- Clearing and Levelling the Land
- Vegetation Removal
- Debris and Rock Removal
- Demolition of Existing Structures
- Environmental Considerations
- Ensuring a Stable Foundation
- Drainage Considerations
- Cutting and Filling
- Marking the Boundaries
- Surveying the Land
- Setting Corner Stakes
- String Lines and Batter Boards
- Checking for Encroachments
- Approval from Authorities
- Setting Up Temporary Utilities
- Temporary Water Supply
- Temporary Electricity Supply
- Sanitation Facilities
- Temporary Fencing and Security
- Waste Management
- Step 4 - Foundation Construction
- Types of Foundation: Shallow vs. Deep
- Shallow Foundations
- Strip Footing
- Spread Footing
- Raft Foundation
- Deep Foundations
- Pile Foundation
- Pier Foundation
- Caisson Foundation
- Excavation and Laying the Foundation
- Site Survey and Marking
- Excavation
- Soil Stabilisation
- Laying the Foundation
- Curing
- Backfilling
- Importance of Waterproofing and Termite Treatment
- Waterproofing
- Membrane Waterproofing
- Drainage Systems
- Sealants
- Termite Treatment
- Soil Treatment
- Wood Treatment
- Regular Inspections
- Step 5 - Framing and Structure
- Building the Structure: Columns, Beams, and Slabs
- Columns
- Reinforced Concrete Columns
- Placement and Spacing
- Beams
- Types of Beams
- Reinforcement
- Slabs
- Types of Slabs
- Casting the Slab
- Brickwork and Wall Construction
- Brickwork
- Mortar
- Laying the Bricks
- Reinforcement
- Wall Construction
- Partition Walls
- Plastering
- Installation of Windows and Doors
- Windows
- Types of Windows
- Installation
- Doors
- Types of Doors
- Installation
- Step 6 - Roofing
- Choosing the Type of Roof: Flat or Sloped
- Flat Roofs
- Advantages
- Considerations
- Sloped Roofs:
- Advantages
- Considerations
- Laying the Roof Slab
- Roof Slab Construction
- Formwork
- Reinforcement
- Pouring the Concrete
- Curing
- Waterproofing and Insulation
- Waterproofing
- Membrane Waterproofing
- Liquid Waterproofing
- Drainage Systems
- Insulation
- Types of Insulation
- Installation
- Step 7 - Electrical and Plumbing Works
- Laying Electrical Wires and Conduits
- Planning and Layout
- Laying Conduits and Wires
- Testing and Inspection
- Installation of Plumbing Lines and Fixtures
- Planning the Plumbing Layout
- Installing Plumbing Lines
- Installing Fixtures
- Ensuring Proper Drainage Systems
- Designing the Drainage System
- Installation
- Testing and Maintenance
- Step 8 - Interior and Exterior Finishes
- Interior Finishes
- Plastering Walls and Ceilings
- Preparation
- Application
- Flooring: Tiles, Marble, and Wood
- Tiles
- Marble
- Wood
- Painting and Wall Finishes
- Painting
- Wall Finishes
- Exterior Finishes
- Plastering and Painting
- Cladding and Siding
- Landscaping
- Step 9 - Installation of Fixtures & Fittings
- Kitchen and Bathroom Fittings
- Kitchen Fittings
- Bathroom Fittings
- Lighting Fixtures
- Types of Fixtures
- Doors and Windows
- Doors
- Windows
- Ventilation Systems
- Exhaust Fans
- HVAC Systems
- Step 10 - Final Inspection and Handover
- Conducting Final Inspections
- Quality Checks
- Safety Inspections
- Compliance with Building Codes
- Addressing Defects and Issues
- Identifying and Documenting Issues
- Rectification and Repairs
- Final Approval
- Handover to the Owner
- Documentation
- Walkthrough
- Handover of Keys
- Conclusion
- FAQ
Introduction:
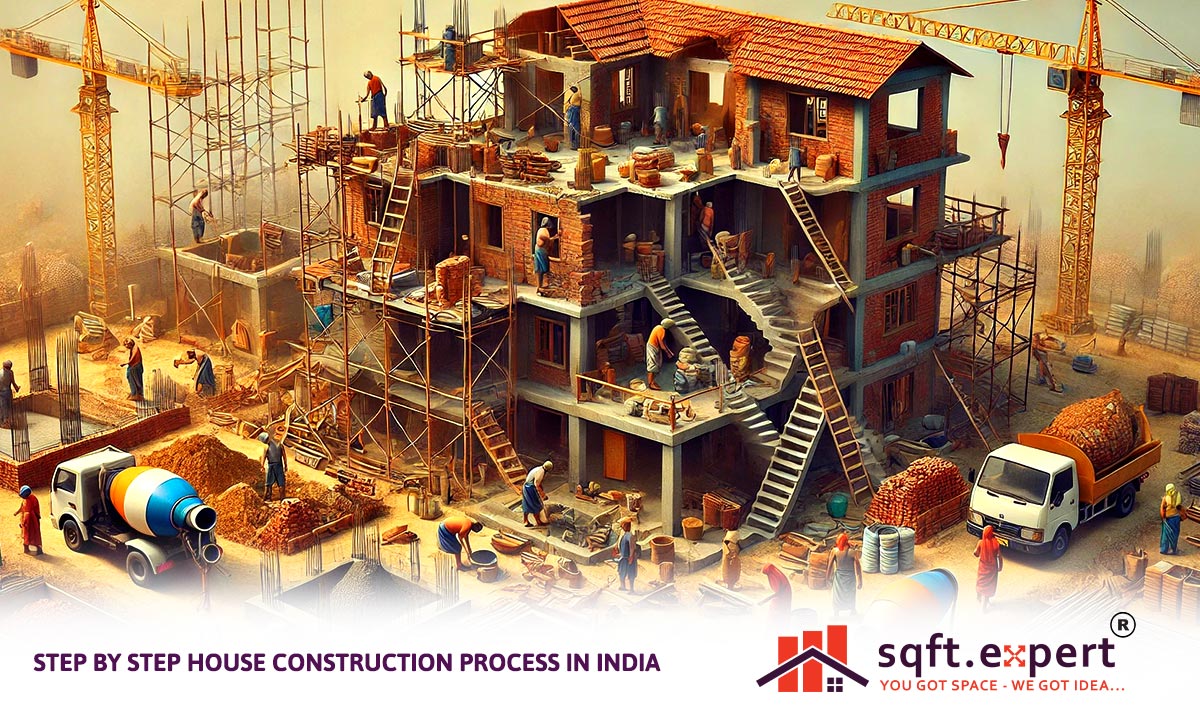
Building a house is a dream for many in India. It’s a significant milestone that marks the culmination of years of hard work, savings, and planning. But constructing a house isn’t just about putting bricks together; it’s a complex process that involves careful planning, coordination, and execution. Understanding this process is crucial for anyone looking to build their own home. This introduction will provide a brief overview of the step by step house construction in India, why it's important to understand the construction process, and a glimpse into the steps involved.
House construction in India has evolved over the years, blending traditional methods with modern technology. Whether it's a simple one-story house in a rural area or a multi-story home in a bustling city, the process remains fundamentally the same but varies in complexity and scale.
In India, the process often starts with selecting the right plot of land, followed by planning the design with an architect. Once the design is finalised, the construction begins, usually under the supervision of a contractor or an engineer. The process involves multiple stages, including laying the foundation, building the structure, and finishing the interiors. Each stage requires attention to detail and adherence to local building codes and regulations.
For many, building a house is the most significant investment they will make in their lifetime. With such a large investment at stake, it’s important to be well-informed about the construction process. The house construction process in India can be broken down into several key steps like Planning and Design, Approvals and Legalities, Site Preparation, Foundation Construction,Framing and Structure, Finishing Work, Final Inspection and Handover.
Understanding these steps will help you navigate the construction process more confidently, ensuring that your dream home is built to your satisfaction. Now let us go through the building construction process step by step in detail.
Step1 - Planning and Design:
Building a house is a significant endeavour, especially in India, where the blend of traditional practices and modern techniques creates a unique approach to construction. The initial phase of this journey—planning and design—is crucial to ensure that your dream home is both aesthetically pleasing and structurally sound. This article will guide you through the essential aspects of planning and design in the house construction process, including selecting the plot, the importance of soil testing, collaborating with architects and structural engineers, and finalising the house plan and design. By understanding these elements, you can navigate the step-by-step house construction process with confidence.
Selecting the Plot
The first step in the house construction process is selecting the right plot of land. This decision lays the foundation for your entire project, influencing not just the design but also the cost, sustainability, and overall success of the construction. Here are some key considerations:
Location:
The location of your plot should align with your lifestyle needs. Consider proximity to work, schools, hospitals, and markets. Also, assess the neighbourhood's safety, future development plans, and connectivity to public transportation.
Size and Shape:
The size and shape of the plot will directly impact the design of your house. A larger plot offers more flexibility in design, but it also comes with higher costs. A well-shaped plot (rectangular or square) is generally easier to work with than an irregular one.
Legal Clearances:
Before purchasing a plot, ensure it has all the necessary legal clearances, including ownership documents, approval from the local municipal authority, and no pending disputes. Failing to do so can lead to legal complications during the construction process.
Topography and Climate:
Consider the plot's topography (slope, elevation) and the local climate. These factors will influence the design, drainage system, and construction materials used in your home.
Selecting the right plot is a critical first step in the steps in house construction process. It sets the stage for the subsequent steps, ensuring that the land you build on is both suitable and legally sound.
Importance of Soil Testing
Once you have selected the plot, the next crucial step is soil testing. The importance of soil testing cannot be overstated, as the soil’s properties directly affect the stability and durability of your house’s foundation.
Understanding Soil Type:
Different types of soil (clay, sandy, rocky) have different bearing capacities, which determine how much weight they can support. A soil test will reveal the soil type and help in designing a suitable foundation.
Assessing Soil Strength:
Soil strength varies, and a soil test will assess whether the soil can support the structure without excessive settling or shifting. Weak soil may require additional treatment or a different type of foundation.
Identifying Potential Issues:
Soil testing can identify issues like soil contamination, high water table levels, or the presence of underground rocks. Addressing these issues early can prevent future problems such as foundation cracks or water seepage.
Compliance with Regulations:
Many local authorities in India require a soil test report before granting construction approval. This ensures that the foundation design is appropriate for the soil conditions, safeguarding the structure and its occupants.
Conducting a thorough soil test is an essential step in the step-by-step house construction process. It provides valuable information that influences the design and construction of your home’s foundation, ensuring long-term stability and safety.
Collaborating with Architects and Structural Engineers

With the plot selected and the soil tested, the next step is to collaborate with architects and structural engineers to design your home. This collaboration is vital in transforming your vision into a functional, safe, and aesthetically pleasing structure.
Role of the Architect:
Architects are responsible for creating the overall design of your home, focusing on both aesthetics and functionality. They will work with you to understand your needs, preferences, and budget, and then translate these into a detailed house plan.
Role of the Structural Engineer:
While the architect focuses on the design, the structural engineer ensures that the design is structurally sound. They calculate the load-bearing requirements, design the foundation and framing, and ensure that the structure can withstand environmental stresses like wind, earthquakes, and floods.
Coordination Between Professionals:
Effective collaboration between the architect and structural engineer is crucial. The architect’s design ideas must be feasible from an engineering perspective, and the engineer’s structural requirements should align with the design vision. Regular communication and coordination help prevent costly redesigns and construction delays.
Budget Considerations:
Both architects and structural engineers play a key role in budget management. They help you make informed decisions about materials, construction methods, and design features that meet your budget without compromising on quality.
Collaborating with these professionals ensures that your house is not only beautiful but also safe, durable, and compliant with local building codes. Their expertise is indispensable in the steps in house construction process.
Finalising the House Plan and Design

The final step in the planning and design phase is to finalise the house plan and design. This step involves refining the details, ensuring compliance with regulations, and preparing for the actual construction.
Detailed Planning:
This involves finalising the layout of the house, including the placement of rooms, windows, doors, and other features. The plan should optimise space, light, and ventilation while reflecting your lifestyle and preferences.
Compliance and Approvals:
Before construction can begin, the final house plan must be submitted to local authorities for approval. This ensures that the design complies with zoning laws, building codes, and other regulations.
Selection of Materials:
The final design will also specify the materials to be used in construction, from the type of bricks and cement to the flooring and roofing materials. The choice of materials will influence the house’s durability, cost, and environmental impact.
Preparing for Construction:
With the plan and design finalised, the next step is to prepare for construction. This involves hiring a contractor, setting a timeline, and securing the necessary permits and resources.
Finalising the house plan and design is a critical step that brings your vision closer to reality. It sets the stage for the construction phase, ensuring that everything is in place for a smooth and successful build.
Step 2 - Approvals and Legalities
Building a house in India is a dream for many, but it comes with a maze of legalities and approvals that must be navigated carefully. Before laying the foundation, it’s essential to ensure that you have all the necessary permits and approvals in place. Understanding and complying with local building regulations, environmental norms, and safety standards is not just a legal requirement but also a crucial step in ensuring that your construction project proceeds smoothly and without costly interruptions. Here in this blog we will guide you through the process of acquiring the necessary permits, the importance of checking local building regulations, and ensuring compliance with environmental and safety norms. By understanding these aspects, you can confidently navigate the 11 steps of house construction and follow the step by step process of building construction without any legal hurdles.
Acquiring Necessary Permits and Approvals
The first step in the step by step process of building construction is acquiring the necessary permits and approvals from local authorities. These permits are vital because they confirm that your construction project complies with the local laws and regulations, ensuring the safety and legality of your home. Here’s what you need to know:
Building Plan Approval:
Before you start construction, your house plan must be approved by the local municipal authority or town planning department. This approval process involves submitting detailed architectural drawings, structural plans, and site maps for review. The authorities will check if your plan adheres to the building codes and zoning laws of the area.
Land Title Clearance:
Ensuring that the land title is clear and undisputed is crucial. You must obtain a No Objection Certificate (NOC) from the local authorities, confirming that the land is free from any legal disputes and can be used for residential construction.
Environmental Clearance:
In certain areas, especially if your plot is close to forests, water bodies, or in a region prone to environmental sensitivities, you may need an environmental clearance. This ensures that your construction does not negatively impact the local ecosystem. One needs to obtain the Environmental Clearance Certificate (ECC) from the concerned authorities.
Soil Test Report:
Some local authorities require a soil test report before granting construction approval. This report confirms that the soil is suitable for building a structure and that the foundation design is appropriate for the soil conditions.
Height Clearance:
If you’re building a multi-story house, you may need height clearance from the aviation authority, especially if the construction site is near an airport. This clearance ensures that your building does not interfere with air traffic.
Utility Approvals:
You will also need to obtain approvals for water, electricity, and sewage connections. These utilities are essential for the construction process and future habitation.
Acquiring these permits and approvals is a vital step in the 11 steps of the house construction process. It ensures that your project is legally sound and reduces the risk of future legal challenges or delays.
Importance of Checking Local Building Regulations
Local building regulations, also known as building codes, are a set of rules that specify the standards for construction, design, and materials. These regulations vary from place to place and are enforced to ensure safety, health, and the general welfare of the public. Adhering to these regulations is crucial in the step by step process of building construction. Here’s why:
Safety Compliance:
Building regulations are designed to ensure that your house is safe for habitation. They cover everything from the strength of the structure, fire safety measures, electrical wiring, and plumbing systems to the quality of materials used. Non-compliance can lead to serious safety issues, making it mandatory to adhere strictly to these codes.
Avoiding Legal Penalties:
Failing to comply with local building regulations can result in severe penalties, including fines, legal action, or even demolition of the unauthorised structure. Ensuring that your construction project meets all regulatory requirements helps you avoid these costly consequences.
Zoning Laws:
Zoning laws dictate how a piece of land can be used, whether for residential, commercial, or industrial purposes. They also specify the type of buildings that can be constructed, their height, density, and the distance from roads and other structures. Adhering to zoning laws is essential for getting your building plan approved.
Adapting to Local Conditions:
Building regulations take into account local conditions such as climate, natural disasters (earthquakes, floods), and soil type. By following these regulations, you ensure that your house is designed to withstand local environmental challenges.
Resale Value:
A house built in compliance with local building regulations has a higher resale value. Buyers are more confident in purchasing a property that meets all legal and safety standards, knowing that it will not face future legal issues.
Checking and complying with local building regulations is a critical step in the 11 steps of house construction. It ensures that your house is safe, legal, and built to last.
Ensuring Compliance with Environmental and Safety Norms
Environmental and safety norms are becoming increasingly important in the construction industry, especially in densely populated and environmentally sensitive areas. Ensuring compliance with these norms is not only a legal requirement but also a responsibility toward the community and the environment. Here’s how to incorporate these considerations into your step by step process of building construction:
Environmental Impact Assessment (EIA):
In some cases, especially for large projects or in ecologically sensitive areas, an Environmental Impact Assessment (EIA) may be required. The EIA evaluates the potential environmental effects of your construction project and suggests mitigation measures to minimise negative impacts.
Waste Management:
Proper disposal of construction waste is crucial to prevent environmental contamination. This includes recycling materials where possible, disposing of hazardous materials safely, and ensuring that waste does not pollute nearby water bodies or land.
Water Conservation:
Implementing water conservation measures, such as rainwater harvesting systems, efficient plumbing fixtures, and wastewater treatment, is essential for sustainable construction. Many local authorities now require these measures as part of the building approval process.
Energy Efficiency:
Incorporating energy-efficient designs and materials, such as proper insulation, energy-efficient windows, and solar panels, not only reduces your house’s environmental footprint but also helps in obtaining necessary approvals more easily.
Safety Standards:
Ensuring that your construction site adheres to safety standards protects both workers and future occupants. This includes proper scaffolding, safety gear for workers, and adherence to fire safety norms in the building design.
Noise and Air Pollution Control:
Construction activities can generate significant noise and dust, which can be harmful to the environment and nearby residents. Implementing dust control measures, limiting construction work to certain hours, and using noise barriers are ways to comply with pollution control norms.
Ensuring compliance with environmental and safety norms is a key aspect of the 11 steps of house construction. It not only helps in securing approvals but also contributes to building a sustainable and safe home.
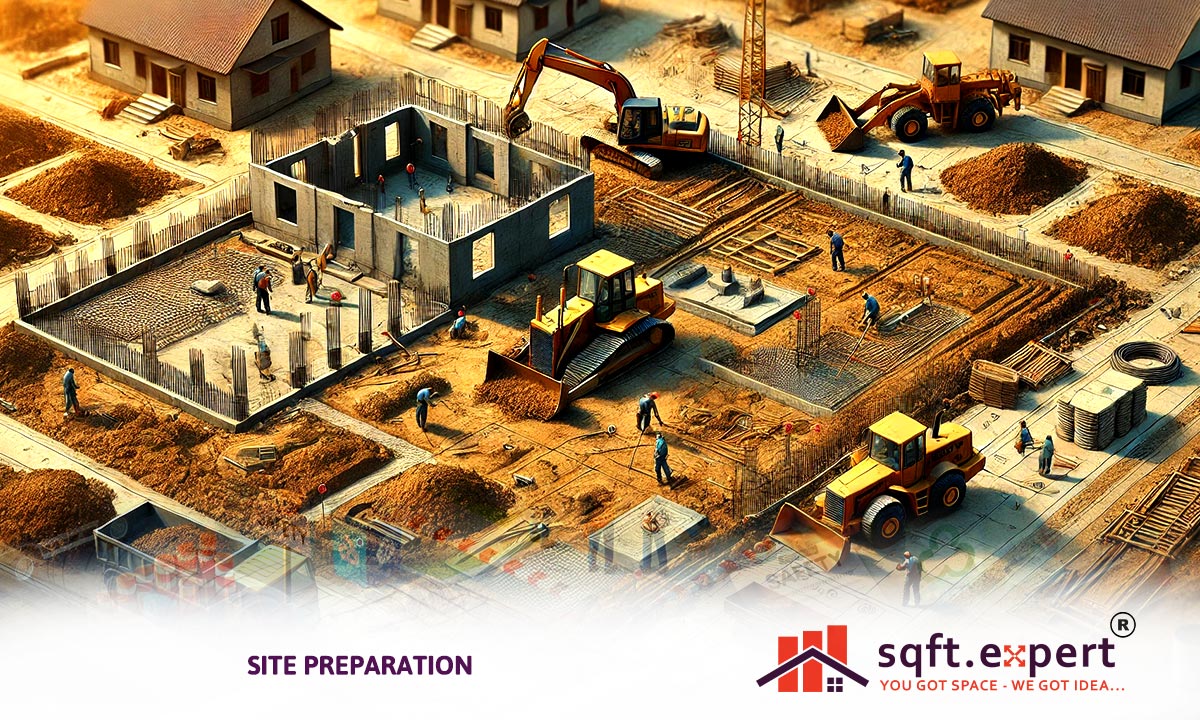
Step 3 - Site Preparation:
Site preparation is one of the most critical stages in the house construction process. It involves various activities that ensure the construction site is ready for the building phase. Proper site preparation not only lays the foundation for a stable and safe structure but also prevents potential problems during construction. This article will guide you through the essential aspects of site preparation, including clearing and levelling the land, marking the boundaries, and setting up temporary utilities like water and electricity. Understanding these steps in the steps in building a house process will help you manage your project more effectively and avoid unnecessary delays.
Clearing and Levelling the Land
The first step in site preparation is clearing the land of any obstacles that might interfere with construction. This process involves removing vegetation, rocks, debris, and any existing structures that are not part of the new construction plan. Here’s how it’s done:
Vegetation Removal:
Trees, shrubs, and other vegetation are removed from the site to provide a clear area for construction. Depending on the size and density of the vegetation, this can be done manually or with the help of heavy machinery like bulldozers and excavators.
Debris and Rock Removal:
Any debris, rocks, or large stones that could obstruct the construction process are cleared away. This is crucial to ensure that the ground is free from any obstacles that could affect the stability of the foundation.
Demolition of Existing Structures:
If there are any old buildings or structures on the site that are not part of the new construction plan, they must be demolished. This should be done carefully, ensuring that all rubble is removed and disposed of properly.
Environmental Considerations:
During clearing, it's important to consider environmental factors. For example, large trees might need special permission to be cut down, and there may be regulations regarding the disposal of certain types of waste.
After clearing the land, the next step is levelling it. Levelling the site is crucial for ensuring that the foundation of the house is laid on a stable and even surface. Here’s why levelling is essential in the steps to construct a house:
Ensuring a Stable Foundation:
An uneven surface can lead to an unstable foundation, causing structural issues in the future. Levelling the land ensures that the foundation is laid evenly, providing a stable base for the house.
Drainage Considerations:
Proper levelling also helps in designing an effective drainage system. Water should naturally flow away from the building, preventing waterlogging and potential damage to the foundation.
Cutting and Filling:
Levelling often involves cutting (removing excess soil) and filling (adding soil) to create a flat surface. This process requires careful planning to ensure that the soil is compacted and stable, reducing the risk of settling later on.
Clearing and levelling the land are foundational steps in the steps in building a house process. They prepare the site for the construction phase, ensuring that the foundation is stable and the construction can proceed smoothly.
Marking the Boundaries:
Once the land is cleared and levelled, the next step in site preparation is marking the boundaries. This is a crucial activity that defines the exact area where the house will be built, ensuring that the construction is carried out within the designated limits.
Surveying the Land:
A land surveyor is usually hired to measure and mark the boundaries of the plot accurately. This involves using specialised equipment to ensure that the measurements are precise and that the construction follows the approved plan.
Setting Corner Stakes:
Corner stakes are placed at the corners of the plot to mark the boundary lines. These stakes serve as reference points during the construction process, helping builders stay within the legal boundaries.
String Lines and Batter Boards:
String lines are stretched between the corner stakes to outline the edges of the house's foundation. Batter boards are also set up, providing a guide for laying out the foundation walls and ensuring that everything is aligned correctly.
Checking for Encroachments:
Marking the boundaries helps prevent encroachment on neighbouring properties. It ensures that the house is built within the legal limits of the plot, avoiding potential legal disputes in the future.
Approval from Authorities:
Before proceeding with construction, the marked boundaries must be inspected and approved by the local authorities. This ensures that the construction plan complies with zoning laws and other regulations.
Marking the boundaries is an essential part of the steps to construct a house. It defines the construction area, ensuring that the house is built in the correct location and in accordance with legal requirements.
Setting Up Temporary Utilities
Before construction begins, it’s crucial to set up temporary utilities like water, electricity, and sanitation facilities on the site. These utilities are necessary for the smooth execution of the construction process and the safety of the workers.
Temporary Water Supply:
A reliable water supply is essential for various construction activities, such as mixing concrete, curing, and cleaning. Depending on the site’s location, you can arrange for a temporary water connection from the local municipality or set up a water tank that can be refilled as needed.
Temporary Electricity Supply:
Construction requires a consistent and safe electricity supply for operating tools, machinery, and lighting. A temporary electricity connection can be obtained from the local power provider, or a generator can be used if the site is in a remote location.
Sanitation Facilities:
Providing proper sanitation facilities for workers is crucial for maintaining hygiene and safety on the construction site. Portable toilets and handwashing stations should be set up and regularly maintained.
Temporary Fencing and Security:
While not a utility, temporary fencing and security measures are essential to protect the construction site from unauthorised access, theft, trespassing or vandalism. Fencing also ensures the safety of the public by keeping them away from the construction area.
Waste Management:
Setting up a waste management system is important to handle construction debris and waste materials. Proper disposal methods should be in place to maintain a clean and organised site.
Setting up these temporary utilities is a critical step in the steps in building a house process. It ensures that the construction can proceed without interruptions, providing the necessary resources and infrastructure to support the building activities.
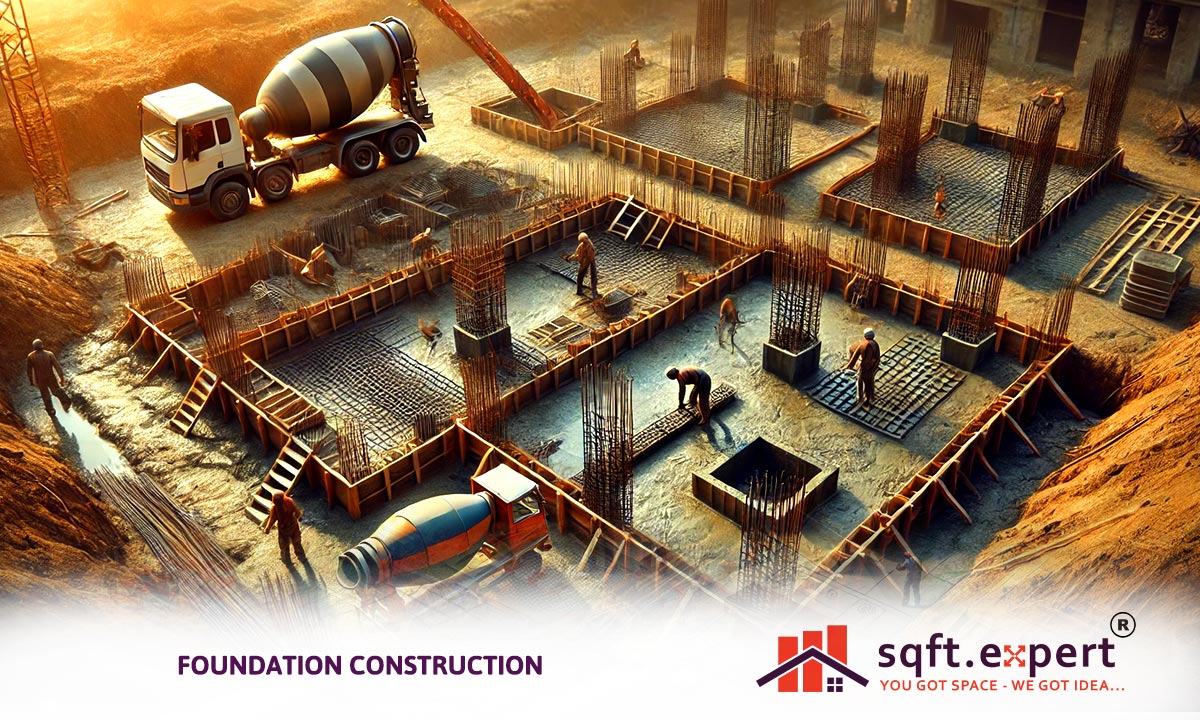
Step 4 - Foundation Construction:

The foundation is arguably the most critical part of any house construction project. It bears the weight of the entire structure and ensures that the building remains stable and secure for years to come. Whether you're building a small home or a large multi-story building, getting the foundation right is essential. Here, we'll explore the types of foundations, the process of excavation and laying the foundation, and the importance of waterproofing and termite treatment. Understanding these elements is key to navigating the steps to construct a house and ensuring that your home is built on solid ground.
Types of Foundation: Shallow vs. Deep
The type of foundation used in a construction project depends on various factors, including the soil type, the load-bearing capacity required, and the design of the building. Foundations are generally categorised into two types: shallow and deep. Choosing the right foundation type is an important decision in the steps in home construction.
Shallow Foundations: Shallow foundations are used when the soil has adequate strength to support the load of the building close to the surface. These foundations are typically used for small to medium-sized buildings, where the load is not excessively heavy. Common types of shallow foundations include:
Strip Footing:
This type of foundation is used for load-bearing walls. It consists of a continuous strip of concrete that spreads the weight of the wall over a wider area.
Spread Footing:
Also known as isolated footing, this is used under individual columns or piers. The footing spreads the load over a larger area of the soil.
Raft Foundation:
This is a large, thick concrete slab that covers the entire area of the building, distributing the load evenly. Raft foundations are often used in areas with weak or uneven soil conditions.
Deep Foundations:
When the surface soil is weak and cannot support the building load, deep foundations are required. These foundations transfer the load to a deeper, more stable layer of soil or rock. Common types of deep foundations include:
Pile Foundation:
Piles are long, slender columns made of concrete, steel, or wood that are driven deep into the ground. They transfer the building load to deeper, more stable soil layers or rock.
Pier Foundation: Piers are large cylindrical columns that are drilled into the ground to support the building. They are often used in areas with expansive soils or where the load-bearing capacity of the surface soil is inadequate.
Caisson Foundation: Similar to pile foundations, caissons are large-diameter shafts drilled deep into the ground and filled with concrete. They are typically used for large, heavy structures like bridges and high-rise buildings.
Choosing the right type of foundation is a crucial step in the steps to construct a house. It ensures that the building is supported by a stable and durable base, reducing the risk of settling or structural damage in the future.
Excavation and Laying the Foundation
Once the type of foundation has been selected, the next step in the steps in home construction is excavation and laying the foundation. This process involves preparing the ground for the foundation, ensuring that it is stable and ready to support the structure.
Site Survey and Marking:
Before excavation begins, a detailed site survey is conducted to mark the exact location and dimensions of the foundation. This ensures that the excavation is done accurately, following the approved building plan.
Excavation:
Excavation involves digging the ground to the required depth and dimensions for the foundation. The depth and size of the excavation depend on the type of foundation being used and the load it needs to support. For shallow foundations, the excavation is usually not very deep, while deep foundations require extensive digging.
Soil Stabilisation:
In some cases, the soil may need to be stabilised before laying the foundation. This can involve compacting the soil, adding gravel or sand, or using chemical stabilisers to improve the soil's load-bearing capacity.
Laying the Foundation:
After excavation, the foundation is laid according to the type selected. For shallow foundations, this usually involves pouring concrete into the excavated area, reinforcing it with steel bars if necessary. For deep foundations, piles or piers are driven into the ground, and the tops are connected with a concrete cap or beam to distribute the load.
Curing:
Once the concrete is poured, it needs time to cure and gain strength. Curing involves keeping the concrete moist for several days to ensure that it hardens properly and reaches its full load-bearing capacity.
Backfilling:
After the foundation has cured, the excavated soil is often used to backfill around the foundation, providing additional support and stability.
Proper excavation and laying the foundation are vital steps in the steps to construct a house. They ensure that the foundation is strong, stable, and capable of supporting the weight of the building.
Importance of Waterproofing and Termite Treatment

Waterproofing and termite treatment are critical components of foundation construction. They protect the foundation from water damage and termite infestation, both of which can weaken the structure and lead to costly repairs down the line.
Waterproofing:
Waterproofing is essential to prevent water from seeping into the foundation and causing damage. Water can weaken the concrete, leading to cracks and structural issues. Waterproofing is especially important in areas with high groundwater levels or heavy rainfall.
Membrane Waterproofing:
This involves applying a waterproof membrane to the outside of the foundation walls. The membrane acts as a barrier, preventing water from penetrating the concrete.
Drainage Systems:
Proper drainage systems should be installed around the foundation to divert water away from the building. This includes installing French drains, sump pumps, or sloping the ground away from the foundation.
Sealants:
Concrete sealants can be applied to the surface of the foundation to provide an additional layer of protection against water infiltration.
Termite Treatment:
Termites can cause significant damage to a building's foundation, especially if it's made of wood or contains wooden elements. Termite treatment involves applying chemicals to the soil and foundation to repel or kill termites before they can infest the structure.
Soil Treatment:
Termiticides are applied to the soil around the foundation before construction begins. This creates a barrier that prevents termites from entering the building.
Wood Treatment:
Any wooden elements used in the foundation or construction should be treated with chemicals that repel termites and prevent infestation.
Regular Inspections:
After construction, regular inspections should be carried out to check for signs of termite activity. Early detection can prevent significant damage.
Waterproofing and termite treatment are crucial steps in the steps in home construction. They protect the foundation from two of the most common and destructive problems—water damage and termite infestation—ensuring the longevity and durability of the structure. Hope you have got that right!
Step 5 - Framing and Structure
Framing and structure are the heart of any building project. They provide the skeleton that supports the entire structure and ensures its stability and durability. Whether you are constructing a small house or a large commercial building, understanding the process of building the structure is crucial. This blog article will explore the essential components of framing and structure, including columns, beams, and slabs, brickwork and wall construction, and the installation of windows and doors. These elements are key in the steps for construction of a building and must be carefully planned and executed to ensure the longevity and safety of the structure.
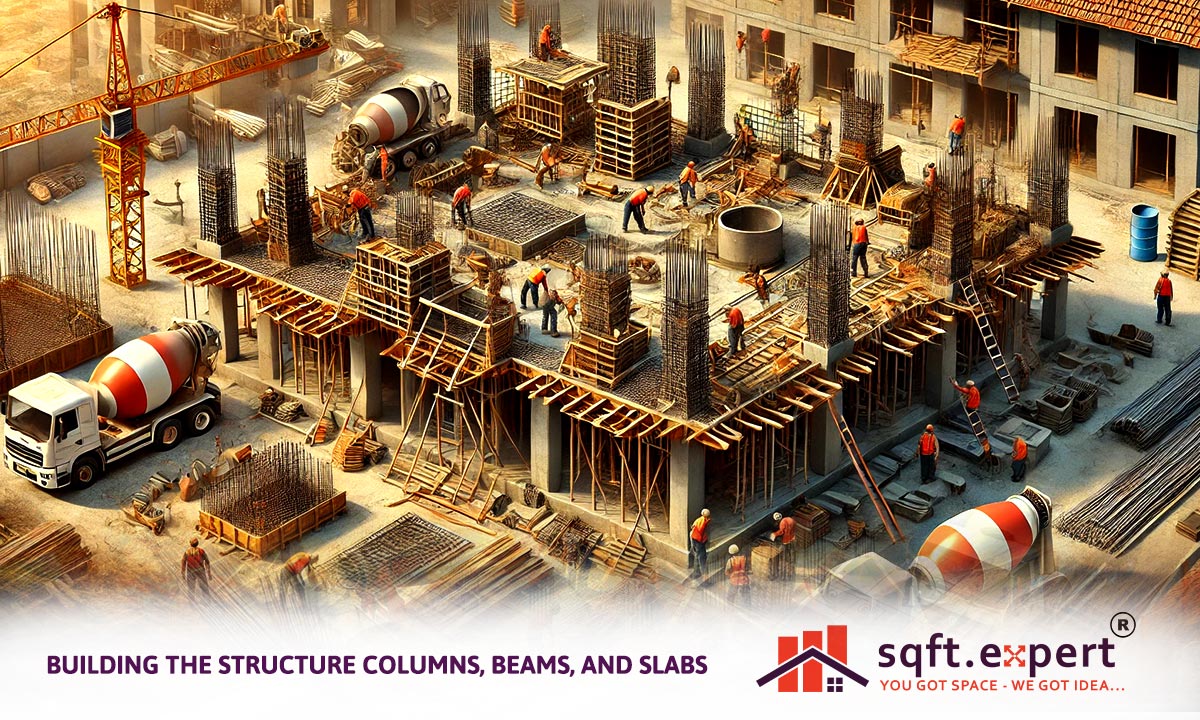
Building the Structure: Columns, Beams, and Slabs

The structural framework of a building consists of various components that work together to support the weight of the building and any external loads it might encounter. The main elements of this framework are columns, beams, and slabs.
Columns:
Columns are vertical structural elements that transfer the load from the building's roof and floors down to the foundation. They are critical in supporting the weight of the entire structure. Columns are typically made of reinforced concrete, steel, or wood, depending on the building's design and requirements.
Reinforced Concrete Columns: In most residential and commercial buildings, reinforced concrete columns are used due to their strength and durability. These columns are made by pouring concrete into a mould that contains steel reinforcement bars (rebar). The steel provides tensile strength, while the concrete provides compressive strength.
Placement and Spacing: Proper placement and spacing of columns are crucial in the steps of building a house. Columns must be positioned according to the structural design to ensure that the load is evenly distributed. Incorrect placement can lead to structural failure.
Beams:
Beams are horizontal structural elements that transfer the load from the slabs to the columns. They are essential for distributing the weight of the building and providing stability.
Types of Beams:
Beams can be made of reinforced concrete, steel, or wood. Like columns, reinforced concrete beams are common in modern construction. Steel beams are often used in industrial buildings, while wooden beams may be used in smaller residential projects.
Reinforcement:
Beams are reinforced with steel bars to provide additional strength. The reinforcement helps the beam resist bending and shear forces, which are critical in maintaining the structural integrity of the building.
Slabs:
Slabs are flat, horizontal surfaces that form the floors and roofs of a building. They are typically made of reinforced concrete and are supported by beams and columns.
Types of Slabs:
Slabs can be either one-way or two-way, depending on how they transfer the load to the beams. One-way slabs transfer the load in one direction, while two-way slabs distribute the load in both directions.
Casting the Slab:
In the steps for construction of a building, casting the slab is a significant milestone. The concrete is poured into a mould supported by temporary scaffolding, and then it is left to cure and harden. Proper curing is essential to ensure the slab reaches its full strength.
Building the structure with columns, beams, and slabs is a critical part of the steps of building a house. These elements form the skeleton of the building, providing the necessary support and stability.
Brickwork and Wall Construction
Once the structural framework is in place, the next step is constructing the walls. Brickwork and wall construction are integral to defining the building's layout and creating the enclosed spaces.
Brickwork:
Brickwork involves laying bricks in a pattern to form walls. Bricks are a popular choice for wall construction due to their durability, fire resistance, and aesthetic appeal.
Mortar:
Mortar, a mixture of cement, sand, and water, is used to bond the bricks together. The quality of the mortar is crucial in ensuring the strength and stability of the walls.
Laying the Bricks:
Bricks are laid in courses (rows), with each course offset from the one below it to create a strong bond. This pattern, known as stretcher bond, is the most common in wall construction.
Reinforcement:
In areas prone to seismic activity or where the walls need to support significant loads, reinforcement bars may be embedded within the brickwork to provide additional strength.
Wall Construction:
In addition to brick walls, modern construction also includes walls made of concrete blocks, stone, or even prefabricated panels.
Partition Walls:
Internal partition walls divide the interior spaces of the building. These walls are usually non-load-bearing and can be made from various materials, including bricks, concrete blocks, or drywall.
Plastering:
After the walls are constructed, they are often plastered to create a smooth surface for painting or other finishes. Plastering also helps protect the walls from moisture and other environmental factors.
Brickwork and wall construction are essential steps in the steps for construction of a building. They define the shape and layout of the building and contribute to its overall strength and stability.
Installation of Windows and Doors

The final stage in the framing and structure process is the installation of windows and doors. These elements are crucial for both the functionality and aesthetics of the building.
Windows:
Windows provide natural light and ventilation to the interior spaces. They also contribute to the building's energy efficiency and aesthetic
appeal.
Types of Windows:
Windows come in various styles, including sliding, casement, and fixed windows. The choice of window type depends on the building's design, location, and the desired functionality.
Installation:
Installing windows involves fitting the window frame into the wall opening and securing it in place. Proper sealing is essential to prevent water infiltration and ensure energy efficiency.
Doors:
Doors provide access to the building and its various rooms. They are also a critical component of the building's security.
Types of Doors:
Like windows, doors come in various styles, including hinged, sliding, and revolving doors. The choice of door type depends on the location and purpose of the door.
Installation:
Door installation involves fitting the door frame into the wall opening, hanging the door on its hinges, and ensuring that it opens and closes smoothly. Proper alignment and sealing are essential to prevent drafts and ensure security.
The installation of windows and doors is a key part of the steps of building a house. These elements complete the building's structure, providing functionality, security, and aesthetic appeal.
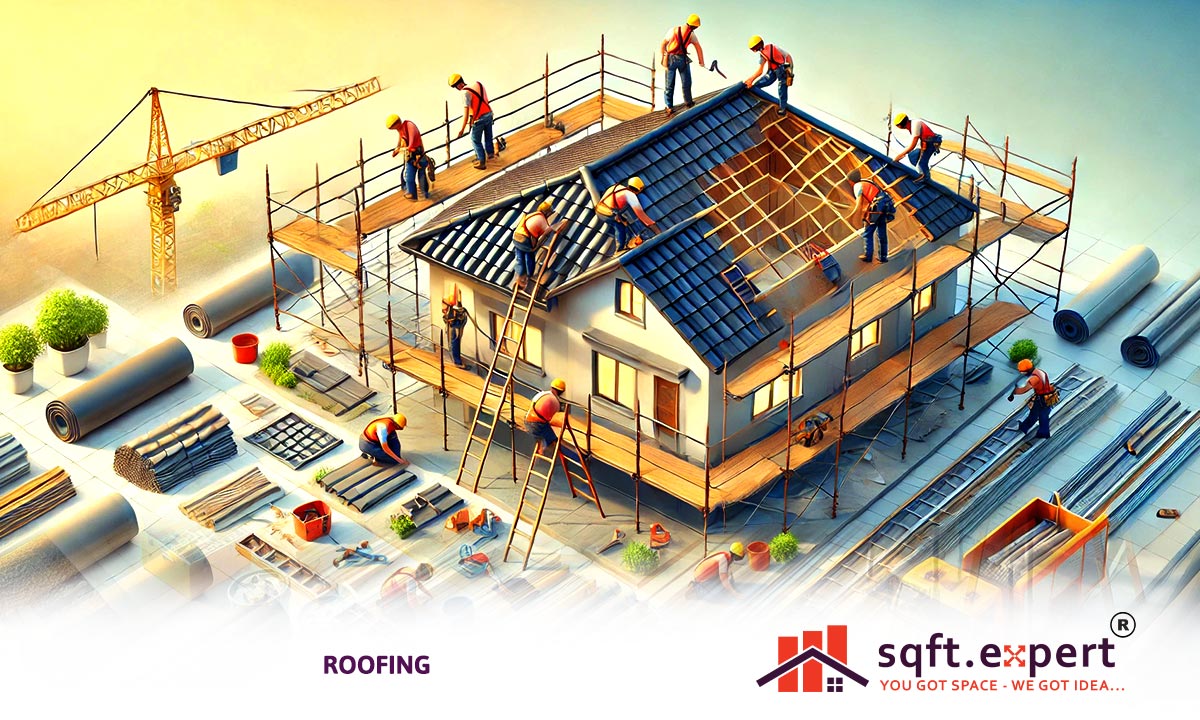
Step 6 - Roofing:

The roof is a crucial component in any home, serving as the primary barrier against the elements and playing a significant role in the overall aesthetic and functionality of the building. Choosing the right type of roof, laying the roof slab, and ensuring proper waterproofing and insulation are vital steps in the house construction process. We will explore these aspects in detail, helping you understand the importance of each step and how they fit into the broader steps in the house construction process.
Choosing the Type of Roof: Flat or Sloped
One of the first decisions to make when it comes to roofing is whether to go with a flat or sloped roof. This choice depends on several factors, including the climate of the area, the architectural style of the house, and the specific needs and preferences of the homeowner.
Flat Roofs:
Flat roofs are common in modern architectural designs and are often chosen for their clean, minimalistic appearance. They are also practical for certain uses, such as creating rooftop gardens or terraces, which are popular in urban areas where outdoor space is limited.
- Advantages: Flat roofs are generally easier and less expensive to construct than sloped roofs. They also provide additional usable space on the roof, which can be utilised for various purposes, such as solar panels, HVAC systems, or even a rooftop garden.
- Considerations: However, flat roofs require more maintenance than sloped roofs. They are more prone to water pooling, which can lead to leaks if not properly waterproofed. In regions with heavy rainfall or snowfall, flat roofs may not be the best choice due to the potential for water accumulation.
Sloped Roofs:
Sloped roofs are the traditional choice for residential buildings and are particularly well-suited for areas with significant rainfall or snowfall. The slope allows water and snow to run off easily, reducing the risk of leaks and structural damage.
- Advantages: Sloped roofs are more effective at shedding water and snow, which makes them a better choice in climates with harsh weather conditions. They also offer more attic space, which can be used for storage or converted into living space.
- Considerations: Sloped roofs are generally more complex and expensive to construct than flat roofs. They also require more materials and labour, which can increase the overall cost of the project. However, their durability and efficiency often justify the higher initial investment.
Choosing between a flat or sloped roof is a critical decision in the steps to building a house checklist. Each option has its benefits and drawbacks, so it’s essential to consider your specific needs and the local climate before making a decision.
Laying the Roof Slab
Once you’ve chosen the type of roof, the next step is laying the roof slab. This is a crucial part of the roofing process and involves creating the solid base on which the rest of the roofing materials will be applied.
Roof Slab Construction:
The roof slab is typically made of reinforced concrete, providing the necessary strength and durability to support the weight of the roof and any additional loads it may bear.
Formwork:
The first step in laying the roof slab is to create a formwork, which acts as a mould for the concrete. The formwork is usually made of wooden or steel panels that are arranged to create the shape of the roof.
Reinforcement:
Steel reinforcement bars (rebar) are placed within the formwork to provide tensile strength to the slab. The rebar must be arranged and spaced according to the structural design to ensure the slab can support the required loads.
Pouring the Concrete:
Once the formwork and reinforcement are in place, the concrete is poured into the mould. The concrete must be evenly distributed and properly compacted to avoid air pockets, which can weaken the slab.
Curing:
After the concrete is poured, it must be allowed to cure for several days. Curing involves keeping the concrete moist to ensure it hardens properly and reaches its full strength. This step is critical in the steps in the house construction process because improper curing can lead to cracks and other structural issues.
Waterproofing and Insulation
Waterproofing and insulation are essential components of the roofing process, ensuring that the roof remains durable, energy-efficient, and comfortable for the occupants of the house.
Waterproofing:
Waterproofing is crucial for protecting the roof from water infiltration, which can cause significant damage to the structure over time. Proper waterproofing is especially important for flat roofs, where water pooling can be a common issue.
Membrane Waterproofing:
This method involves applying a waterproof membrane to the surface of the roof slab. The membrane acts as a barrier, preventing water from penetrating the concrete. Common materials for membrane waterproofing include bitumen, rubber, and synthetic polymers.
Liquid Waterproofing:
Liquid waterproofing involves applying a liquid sealant to the roof surface, which then cures to form a flexible, waterproof layer. This method is often used for complex roof shapes or to provide additional protection over existing waterproofing.
Drainage Systems:
Installing proper drainage systems is also a key part of waterproofing. Gutters, downspouts, and drainage channels should be installed to direct water away from the roof and the building’s foundation.
Insulation:
Roof insulation plays a vital role in maintaining the energy efficiency of the home. It helps keep the house cool in the summer and warm in the winter, reducing the need for heating and cooling systems.
Types of Insulation:
Various materials can be used for roof insulation, including fibreglass, foam boards, and reflective foil. The choice of insulation depends on the type of roof, the climate, and the desired level of thermal efficiency.
Installation:
Insulation is typically installed beneath the roof slab or within the roofing materials. In the steps to building a house checklist, proper insulation is crucial for achieving long-term energy savings and maintaining a comfortable indoor environment.
Roofing is vital in the steps in the house construction process, providing the necessary protection, energy efficiency, and aesthetic appeal to the building. From choosing between flat and sloped roofs to laying the roof slab and ensuring proper waterproofing and insulation, each aspect plays a crucial role in the overall success of the construction project. By carefully considering these factors and following the steps to building a house checklist, you can ensure that your roof will stand the test of time, providing a safe and comfortable shelter for years to come.
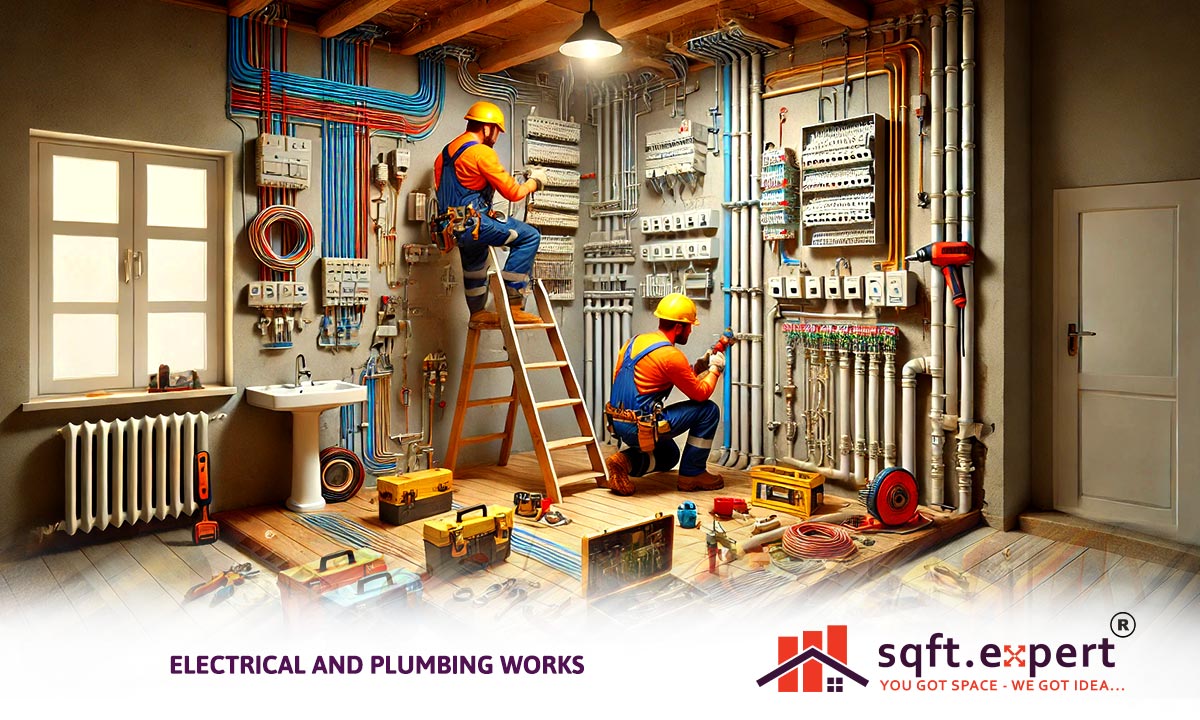
Step 7 - Electrical and Plumbing Works

In the house construction process step by step, electrical and plumbing works play a vital role in ensuring the functionality, safety, and comfort of the home. These systems are the lifelines of the building, providing essential services like electricity, water supply, and waste disposal. In this article we will delve into the key aspects of electrical and plumbing works, including laying electrical wires and conduits, installing plumbing lines and fixtures, and ensuring proper drainage systems. Understanding these elements is crucial in the building construction step by step process, as they directly impact the quality and livability of the finished home.
Laying Electrical Wires and Conduits
The electrical system is one of the most critical components of any building, supplying power to lights, appliances, and other electrical devices. Proper installation of electrical wires and conduits is essential for safety and efficiency.
Planning and Layout:
The first step in the electrical installation is planning the layout. This involves determining the locations of switches, outlets, lights, and other electrical devices based on the house's design and the occupants' needs.Once the layout is finalised, the electrician marks the positions for conduits (protective tubes for electrical wires) on the walls, ceilings, and floors.
Laying Conduits and Wires:
Conduits are installed first, running through the walls, floors, and ceilings to create a pathway for electrical wires. These conduits protect the wires from damage and help organise the electrical system. After installing the conduits, the electrician pulls the electrical wires through them, connecting them to outlets, switches, and the main electrical panel. Each wire is carefully connected to ensure proper functioning and safety. Special care is taken to ensure that the wiring adheres to safety codes and standards to prevent electrical hazards such as short circuits or fires.
Testing and Inspection:
Once the wiring is complete, the electrical system is tested to ensure all connections are correct and functioning properly. This step is crucial in the building construction step by step process, as it ensures that the electrical system is safe and reliable before the walls are closed up.
Installation of Plumbing Lines and Fixtures
The plumbing system is responsible for supplying clean water and removing wastewater, making it a critical part of the house construction process step by step. Proper installation of plumbing lines and fixtures ensures the system's efficiency and prevents future problems.
Planning the Plumbing Layout:
The plumbing layout is planned based on the house's design, including the locations of bathrooms, kitchens, and utility areas. This planning involves determining the routes for water supply lines, drainage pipes, and vent pipes, ensuring that they are properly aligned and accessible for future maintenance.
Installing Plumbing Lines:
The installation of plumbing lines begins with laying the main water supply lines and drainage pipes. These are usually made of PVC, copper, or PEX, depending on the requirements and local building codes.The water supply lines are connected to fixtures such as faucets, showers, and toilets, while the drainage pipes are connected to the sewage system.
Proper sealing and insulation of pipes are essential to prevent leaks and maintain water temperature.
Installing Fixtures:
Once the plumbing lines are in place, the installation of fixtures such as sinks, toilets, showers, and bathtubs can begin. These fixtures are connected to the water supply and drainage lines, ensuring they function properly. Proper installation of these fixtures is crucial for preventing leaks and ensuring efficient water use.
Ensuring Proper Drainage Systems
Proper drainage is essential for the long-term durability of a building and the health and safety of its occupants. A well-designed drainage system prevents water accumulation, which can lead to structural damage, mould growth, and other issues.
Designing the Drainage System:
The drainage system is designed to channel water away from the building's foundation and direct it to the municipal sewage system or a septic tank.
This includes planning for gutters, downspouts, and drainage pipes to handle rainwater and wastewater effectively.
Installation:
Drainage pipes are installed at a slope to ensure water flows naturally away from the building. This is critical in the house construction process step by step, as improper drainage can lead to water damage and foundation issues. Gutters and downspouts are installed to collect rainwater from the roof and direct it away from the foundation. Proper sealing and connection of these components are essential to prevent leaks.
Testing and Maintenance:
After installation, the drainage system is tested to ensure it works efficiently and without leaks. Regular maintenance is also important to keep the system functioning properly over time.
Electrical and plumbing works are crucial components of the building construction step by step process, directly affecting the safety, comfort, and functionality of the home. By carefully planning and executing the installation of electrical wires and conduits, plumbing lines and fixtures, and drainage systems, builders can ensure that the home is equipped with reliable and efficient systems that will serve the occupants well for years to come. Proper attention to these aspects during the house construction process step by step is essential for creating a safe, functional, and comfortable living environment.
Step 8 - Interior and Exterior Finishes:

The finishing stage of house construction is where the building truly comes to life. It’s the phase that transforms a structure of concrete and bricks into a comfortable, aesthetically pleasing home. Here we will explore some key elements of interior and exterior finishes, including plastering walls and ceilings, flooring, painting and wall finishes, and exterior finishes. Understanding these components is crucial step by step in the house construction process, as they are vital to the final appearance and functionality of the home.
Plastering Walls and Ceilings
Plastering is one of the first tasks in the finishing phase and plays a crucial role in preparing the walls and ceilings for painting or other finishes. It involves applying a layer of plaster to the surfaces to create a smooth, even base.
Preparation:
Before plastering, the surfaces must be properly prepared. This includes cleaning the walls and ceilings to remove dust and debris, and sometimes applying a bonding agent to ensure the plaster adheres well.
Cracks or uneven areas on the surface are repaired, and the walls are levelled to ensure a smooth finish.
Application:
Plaster is applied in layers, starting with a rough coat, which is then followed by one or more smooth coats. The plaster is spread evenly across the walls and ceilings using trowels, and care is taken to ensure there are no bumps or ridges.
Proper plastering not only enhances the appearance of the walls but also provides a durable surface that can withstand the wear and tear of daily life.
Plastering is a key step in the steps in house construction, as it sets the stage for the next finishes, such as painting and wall treatments.
Flooring: Tiles, Marble, and Wood
The choice of flooring significantly impacts the look, feel, and functionality of a home. Whether you opt for tiles, marble, or wood, each material offers unique advantages and considerations.
Tiles:
Tiles are a popular choice for flooring due to their durability, ease of maintenance, and wide range of designs. Ceramic or porcelain tiles are commonly used in areas like kitchens and bathrooms because they are water-resistant and easy to clean.
Tile flooring is installed by laying tiles over a layer of adhesive, and the spaces between tiles are filled with grout to create a seamless finish.
Marble:
Marble flooring is known for its elegance and luxurious appeal. It’s often used in living rooms, foyers, and bathrooms. Marble slabs are carefully laid out and polished to a high sheen, creating a smooth, reflective surface. However, marble requires regular maintenance to keep it looking pristine.
Wood:
Wooden flooring adds warmth and a natural touch to a home. It’s available in various types, including hardwood, engineered wood, and laminate. Wooden planks are installed over a subfloor and are often treated with a finish to protect against moisture and wear. Flooring is a vital consideration in the step by step in house construction process, as it not only affects the home’s appearance but also its comfort and usability.
Painting and Wall Finishes
Painting and wall finishes are the final touches that personalise the home and bring colour and character to the interior spaces.
Painting:
Before painting, walls are primed to ensure the paint adheres well and the colour appears consistent. Multiple coats of paint are applied to achieve the desired finish, whether it’s matte, glossy, or satin. The choice of paint colour and finish can dramatically alter the mood and style of a room.
Wall Finishes:
Beyond paint, there are various other wall finishes to consider, such as wallpaper, textured finishes, or wall panels. These finishes add depth and interest to the walls, creating a unique aesthetic that complements the overall design of the home.
Painting and wall finishes are among the final steps in house construction, giving the home its personality and style.
Exterior Finishes
Exterior finishes are crucial for protecting the home from the natural elements and enhancing its curb appeal.
Plastering and Painting:
Similar to the interior, exterior walls are plastered and painted. However, the materials used for exterior plastering and paint are typically more durable and weather-resistant. A good exterior finish protects the building from moisture, UV rays, and temperature fluctuations.
Cladding and Siding:
In addition to painting, some homes feature cladding or siding made from materials like stone, wood, or vinyl. These materials add an extra layer of protection and aesthetic appeal.
Landscaping:
While not a finish in the traditional sense, landscaping is often considered part of the exterior finishing process. Properly designed landscaping enhances the overall look of the property and can significantly boost its value.
Interior and exterior finishes are essential steps in house construction, playing a key role in both the appearance and functionality of a home. From plastering and flooring to painting and exterior finishes, each element contributes to creating a space that is not only beautiful but also durable and comfortable. Understanding these aspects and their place in the step by step in the house construction process ensures that the final product is a home that meets the highest standards of quality and design.
Step 9 - Installation of Fixtures & Fittings:

The installation of fixtures and fittings is one of the final yet crucial stages in the construction of the house. It’s during this phase that the house begins to take on its final form, transforming from a bare structure into a comfortable and functional living space. Here we will cover key aspects of fixture and fitting installation, including kitchen and bathroom fittings, lighting fixtures, doors, windows, and ventilation systems. These elements not only add to the aesthetic appeal of the house but also ensure its functionality and comfort.
Kitchen and Bathroom Fittings
In the stages of construction of the house, the installation of kitchen and bathroom fittings is a critical step. These areas are the most frequently used spaces in any home, and their fittings must be both durable and practical.
Kitchen Fittings:
The kitchen fittings include sinks, faucets, countertops, cabinets, and appliances like ovens and stoves. Each component must be installed with precision to ensure functionality and ease of use. The countertops and cabinets are often customised to fit the kitchen’s layout, providing ample storage and workspace. The sink and faucet are installed with careful attention to plumbing connections to avoid leaks.
Bathroom Fittings:
Bathrooms require careful planning and precise installation of fixtures like toilets, sinks, showers, and bathtubs. The plumbing systems for hot and cold water, as well as drainage, must be accurately connected to avoid any future issues.
The selection of materials, such as tiles and fixtures, should be done keeping in mind both durability and aesthetic appeal. Proper installation ensures that the bathroom is both functional and visually pleasing. These installations are important steps to build a house, as they contribute significantly to the comfort and usability of the home.
Lighting Fixtures
Lighting plays a crucial role in defining the ambiance of a home. The installation of lighting fixtures is one of the final tasks in the stages of construction of the house, but it has a profound impact on the overall look and feel of the space.
Planning the Layout:
The lighting layout is planned based on the house’s design and the specific needs of each room. For example, kitchens and bathrooms require bright, focused lighting, while living rooms and bedrooms may benefit from softer, ambient lighting.
Types of Fixtures:
There are various types of lighting fixtures, including recessed lights, chandeliers, wall sconces, and pendant lights. Each type serves a different purpose and is chosen to complement the room’s design and functionality.
Proper installation ensures that the lighting is evenly distributed and enhances the overall aesthetic of the space. Lighting installation is a key step in the steps to build a house, as it greatly influences the home's atmosphere and functionality.
Doors and Windows
Doors and windows are essential components of any home, providing security, privacy, and natural light. Their installation is a vital part of the stages of construction of the house.
Doors:
Interior and exterior doors are installed during this phase, with attention to both function and style. Exterior doors are typically heavier and more secure, while interior doors can be lighter and more decorative.
The installation process involves fitting the door frames, hanging the doors, and ensuring that they open and close smoothly. Proper alignment is crucial to prevent gaps that could lead to drafts or security issues.
Windows:
Windows are crucial for ventilation and natural light. They also contribute to the home’s energy efficiency, so their installation must be precise. The window frames are fitted securely into the wall openings, and the windows are sealed to prevent air leaks and water infiltration. Double-glazed windows are often chosen for their insulation properties.
Ventilation Systems
Good ventilation is essential for maintaining indoor air quality and comfort. The installation of ventilation systems, including exhaust fans and HVAC systems, is a crucial step in ensuring a healthy living environment.
Exhaust Fans:
Exhaust fans are typically installed in kitchens and bathrooms to remove excess moisture and odours. Proper placement and installation are essential to ensure effective ventilation.
HVAC Systems:
The HVAC (Heating, Ventilation, and Air Conditioning) system controls the home’s temperature and air quality. Its installation involves placing ducts, vents, and the main HVAC unit. Proper installation ensures that the system operates efficiently, providing consistent heating, cooling, and ventilation throughout the home.
The installation of fixtures and fittings is one of the final and most important stages of construction of the house. From kitchen and bathroom fittings to lighting, doors, windows, and ventilation systems, each component plays a vital role in the functionality and comfort of the home. By carefully planning and executing these installations, homeowners can ensure that their house is not only beautiful but also practical and comfortable. These steps are essential in the steps to build a house, transforming a basic structure into a fully functional home.
Step 10 - Final Inspection and Handover

The final inspection and handover are crucial steps in the stages of construction of the house. These steps ensure that everything is in order before the homeowner takes possession of their new home. This process includes conducting thorough inspections, addressing any defects or issues, and finally handing over the keys to the owner. Each step is vital in ensuring that the home meets all safety and quality standards and is ready for occupancy.
Conducting Final Inspections
The final inspection is a comprehensive review of the entire house, focusing on quality, safety, and compliance with building standards. This step is essential to identify any issues that might have been overlooked during the earlier stages of construction of the house.
Quality Checks:
The inspection begins with a thorough examination of the overall quality of the construction. This includes checking the integrity of the walls, ceilings, floors, and finishes. Inspectors will look for any signs of defects, such as cracks, uneven surfaces, or improper installations.
Special attention is given to areas where problems are common, such as around windows, doors, and plumbing fixtures. The quality of materials used, such as tiles, paint, and woodwork, is also assessed to ensure they meet the required standards.
Safety Inspections:
Safety is a top priority in the steps to build a house. The inspection team will check that all safety features are properly installed and functioning. This includes verifying that electrical systems are correctly wired, that there are no exposed wires, and that all switches and outlets are working as intended.
Plumbing systems are inspected to ensure there are no leaks and that all fixtures are securely installed. Fire safety features, such as smoke detectors and fire extinguishers, are also checked to ensure they are in place and operational.
Structural safety is also a focus, with inspectors assessing the stability of the building, including the foundation, beams, and supports.
Compliance with Building Codes:
During the final inspection, it is crucial to verify that the house complies with all local building codes and regulations. This ensures that the construction meets the legal requirements and that the house is safe for occupancy.
Addressing Defects and Issues
Even with the most careful planning and execution, there may still be some defects or issues identified during the final inspection. Addressing these promptly is a critical part of the stages of construction of the house.
Identifying and Documenting Issues:
Any defects or issues found during the inspection are carefully documented. This could include anything from minor cosmetic flaws to more significant structural concerns. The homeowner is typically provided with a detailed report outlining these issues.
Rectification and Repairs:
Once the defects have been identified, the construction team must address them. This could involve repairing cracks, redoing sections of plastering, fixing leaks, or replacing faulty fixtures.
The repair work is conducted as quickly as possible to ensure the project remains on schedule for handover. The quality of these repairs is then re-inspected to ensure they meet the required standards.
Final Approval:
After all issues have been addressed, a final inspection may be conducted to verify that everything is in order. Once the house passes this inspection, it is ready for the handover.
Handover to the Owner
The handover marks the completion of the steps to build a house and is an exciting moment for the homeowner. It is the formal transfer of responsibility from the builder to the owner.
Documentation:
During the handover, the homeowner is provided with all the necessary documentation, including the final inspection report, warranties for materials and workmanship, and user manuals for any installed systems like HVAC or security systems.
Walkthrough:
A final walkthrough with the homeowner is often conducted to explain the features of the house, demonstrate how to use installed systems, and address any last-minute questions or concerns.
Handover of Keys:
The process concludes with the handover of the keys to the homeowner, symbolising the transfer of ownership. The homeowner can now take possession of the property and begin moving in.
The final inspection and handover are critical stages of construction of the house, ensuring that the building is safe, functional, and ready for occupancy. By conducting thorough inspections, addressing any defects, and providing a smooth handover, builders can ensure that homeowners are satisfied with their new home. These steps are vital in the steps to build a house, culminating in a successful and smooth transition from construction to occupancy.
Conclusion:
Building a home is a journey that requires careful planning, attention to detail, and a clear understanding of the process. From selecting the perfect plot to conducting the final inspection, every step is crucial in ensuring that your dream home becomes a reality.
Let's recap the construction process: It begins with planning and design, selecting the plot, and ensuring proper soil testing. Next, comes collaborating with architects and structural engineers to finalise the house plan. The site is then prepared by clearing and levelling the land, followed by constructing the foundation, framing the structure, and installing the roof. After that, the focus shifts to installing electrical and plumbing systems, as well as the fixtures and fittings. Finally, interior and exterior finishes are applied, leading to the final inspection and handover.
Managing the construction of a home can be complex and challenging. This is where professional help becomes invaluable. Sqft.expert is here to assist you through every stage of your house construction process. With our expertise and experience, you can be confident that your project will be handled with the utmost care and professionalism, ensuring that your dream home is built to perfection. By partnering with Sqft.expert, you can enjoy a smooth, hassle-free construction journey, turning your vision into a beautiful reality.
FAQ’s
1. What are the initial steps to start the house construction process in India?
The initial steps include selecting a suitable plot, conducting soil testing, and obtaining necessary approvals and permits from local authorities.
2. How important is soil testing before starting construction?
Soil testing is crucial as it determines the soil's load-bearing capacity, which influences the design of the foundation. It ensures the stability and safety of the structure.
3. What are the key stages of construction of the house?
The key stages include planning and design, site preparation, foundation construction, framing, roofing, installation of electrical and plumbing systems, finishing, and final inspection.
4. How do I choose the right plot for my house?
Consider factors like location, plot size, soil quality, legal clearances, and access to utilities. Consulting with an architect or a builder can help in making the right choice.
5. What permits and approvals are required for house construction in India?
Permits required include building plan approval, environmental clearance, fire safety clearance, and local municipal approvals. These ensure your construction is legal and compliant with regulations.
6. How do I finalise the house design and layout?
Collaborate with an architect to design the layout that meets your needs. The design should also comply with local building codes and regulations.
7. What is the importance of hiring a structural engineer?
A structural engineer ensures that the building is structurally sound and safe, providing detailed calculations and designs for foundations, beams, and columns.
8. What should be considered during the foundation construction?
The type of foundation, depth of excavation, waterproofing, and termite treatment are critical considerations during foundation construction to ensure longevity and stability.
9. When should I install electrical and plumbing systems?
Electrical wiring and plumbing systems are installed after the structural framework is completed but before plastering and wall finishes are applied.
10. What are the steps in building a house after the foundation is laid?
After laying the foundation, the next steps include constructing the columns, beams, and slabs, followed by brickwork, roofing, and installation of doors and windows.
11. How do I choose the right roofing type for my house?
The choice between flat or sloped roofs depends on factors like climate, aesthetic preferences, and functional requirements. A sloped roof is ideal for areas with heavy rainfall, while flat roofs are more common in urban areas.
12. What are the final stages in house construction?
The final stages include plastering, flooring, painting, and installing fixtures and fittings. A thorough final inspection is conducted to ensure everything is in place before handover.
13. How can I ensure quality and safety during construction?
Regular site visits, hiring reputable contractors, and ensuring compliance with building codes are essential for maintaining quality and safety throughout the construction process.
14. What should I do if defects or issues are found during final inspection?
If defects are found, they should be documented and rectified by the builder before the final handover. A follow-up inspection can be conducted to ensure all issues are resolved.
15. Why should I consider professional help from Sqft.expert for my house construction?
Sqft.expert offers expert guidance through every stage of construction, ensuring quality, compliance, and a smooth building process, making your dream home a reality.


